You do not need an electric vacuum sealer to push most of the air out of a freezer bag. A bowl of water can do much of the work.
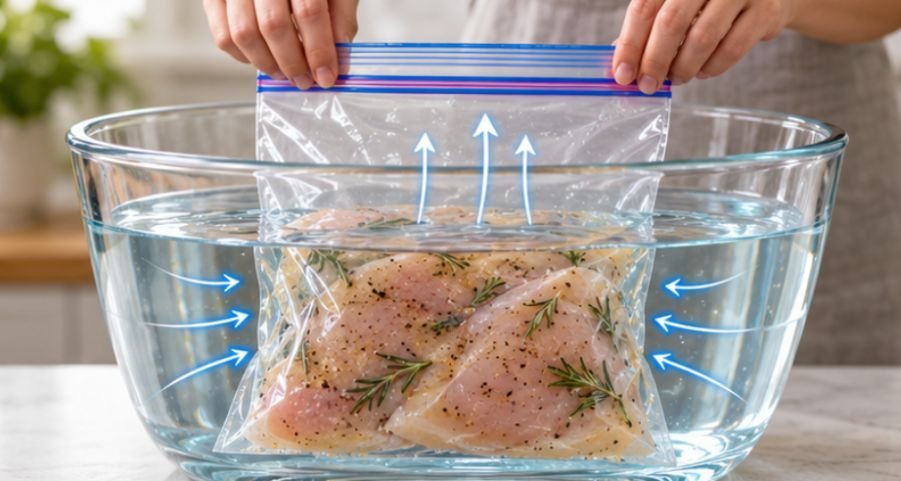
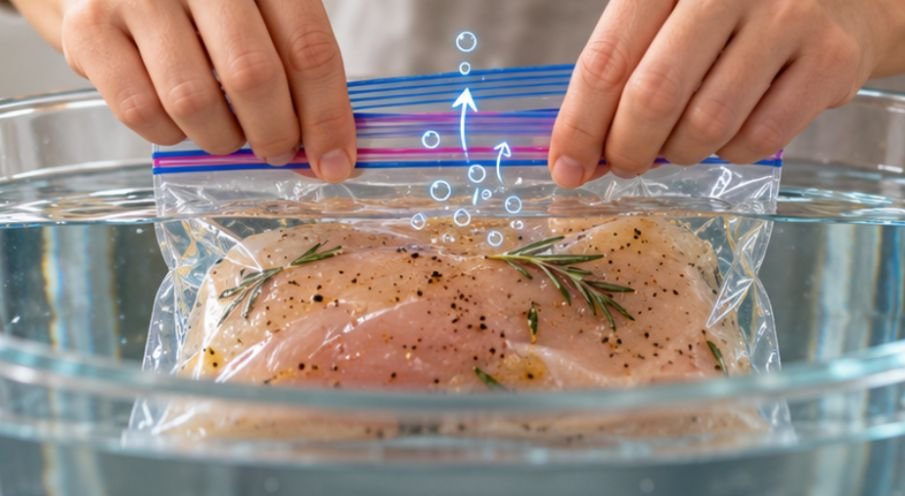
Learning how to water seal food in ziploc bags is useful when I want to freeze meat in compact portions, prepare food for sous vide cooking, or reduce the air surrounding leftovers. The technique is usually called the water-displacement method: water pressure presses the flexible bag against the food while forcing trapped air toward a small opening at the top.
The result is not a commercial vacuum seal, but it can create a surprisingly snug package with equipment most US kitchens already have.
Why Removing Air From a Food Bag Helps
Air matters primarily because oxygen and moisture loss affect food quality.
The USDA explains that freezer burn develops when air reaches frozen food and moisture escapes from its surface. Freezer burn does not automatically make food unsafe, but it can leave meat, vegetables, and prepared foods dry and unpleasant.
The University of Minnesota Extension similarly recommends removing as much air as possible from freezer bags because air exposure contributes to oxidation and freezer burn.
That makes water displacement particularly useful for irregularly shaped foods, where squeezing a bag by hand often leaves pockets of air around corners and surfaces.
How to Water Seal Food in Ziploc Bags Step by Step
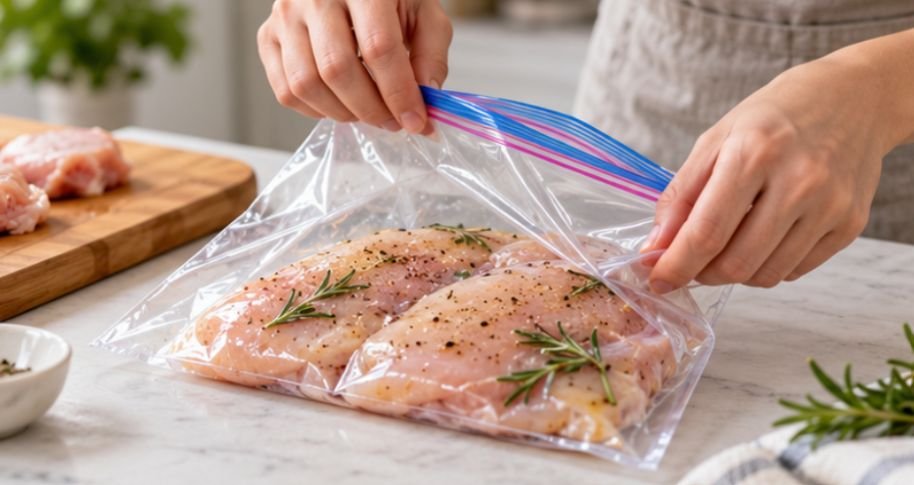
Use a freezer-grade zip-top bag rather than a lightweight sandwich bag, particularly if the food is going into the freezer. The National Center for Home Food Preservation says zip-type bags are suitable for freezing when they are specifically designed and labeled for freezer use.
Then follow this process:
- Put the food into the bag. Arrange meat, vegetables, cooked portions, or other food so the bag can lie relatively flat. Avoid filling it all the way to the zipper.
- Close most of the zipper. Seal the top except for roughly an inch at one corner. That small opening gives displaced air somewhere to escape.
- Fill a pot or bowl with cool water. Choose a container deep enough to surround most of the filled portion of the bag.
- Lower the bag gradually. Keep the open zipper section above the water. As the bag descends, pressure from the surrounding water presses the plastic against the food and pushes air upward.
- Work out stubborn air pockets. If bubbles remain between pieces of food, gently reposition the bag while keeping the zipper opening dry.
- Close the final section. When the water reaches just below the zipper, press the remaining opening shut.
- Remove and dry the bag. Pat the outside dry before refrigerating, freezing, labeling, or placing the bag into an appropriate sous vide setup.
The best test is visual: the plastic should sit closely against most of the food with no large bubbles trapped inside.
Use Freezer Bags, Not Just Any Plastic Bag
A water seal is only as useful as the packaging holding it.
The National Center for Home Food Preservation recommends freezer packaging that resists moisture and vapor and notes that plastic freezer bags work for both dry foods and some liquid packs. It also advises pressing out as much air as possible before closing.
That is why I would choose bags clearly labeled “freezer” for longer storage rather than thin everyday sandwich bags.
For meal planning, portion food before sealing. If you are also building a larger pantry-and-freezer strategy, this fits naturally with planning a 3-month food supply on a budget because smaller labeled portions are easier to rotate and track.
To make the most of ingredients already in your kitchen, try these creative ways to use up stale bread before discarding leftover slices.
Be More Careful With Liquids
Soups, sauces, marinades, and very wet foods require extra caution because the water-displacement method can push liquid toward the zipper.
Keep the food well below the closure and lower the bag slowly. For freezer storage, remember that liquids expand when frozen, so do not pack a completely full bag with no room for expansion.
For thin soups and sauces, another practical option is to freeze the bag flat on a tray before stacking it.
What Water Sealing Does Not Do
The most important misconception is that removing air preserves food by itself. It does not.
Reduced-oxygen packaging may slow oxidation and some spoilage, but it does not kill microorganisms or turn meat, cooked food, sauces, or vegetables into shelf-stable products. Illinois Extension warns that removing oxygen does not eliminate bacterial hazards and that reduced-oxygen environments can create concerns involving organisms such as Clostridium botulinum if foods are stored incorrectly.
So how to water seal food in ziploc bags should be treated as a packaging technique—not as canning, sterilization, or a substitute for refrigeration.
Perishable foods still need proper temperature control.
Keep Sealed Food Cold
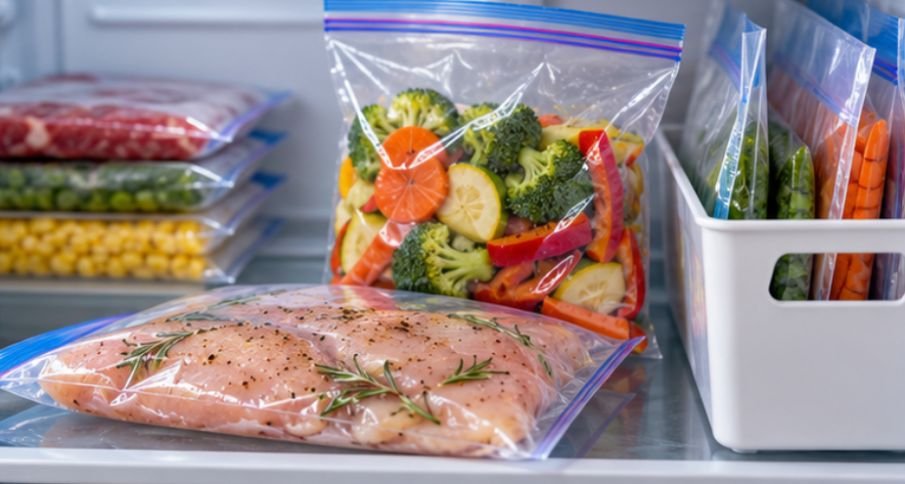
The FDA recommends keeping refrigerators at or below 40°F and freezers at 0°F. Those limits do not change simply because most of the air has been removed from a bag.
USDA guidance also says cooked leftovers generally belong in the refrigerator for three to four days or can be frozen for longer storage. Airtight packaging helps retain moisture and prevent contamination, but refrigeration remains essential.
For affordable meal planning, try these budget-friendly breakfast ideas that can be prepared in batches and frozen in individual portions for busy mornings.
Three Mistakes That Ruin the Method
Letting Water Reach the Opening
Keep the unfinished zipper above the waterline. If water enters, remove the bag, correct the problem, and reseal rather than pretending the package is dry.
Leaving Hidden Air Between Food Pieces
Pieces stacked loosely can trap bubbles. Arrange food in a flatter layer and massage obvious air pockets upward before closing the last inch.
Assuming a Tight Bag Means Unlimited Storage
Sealing improves packaging, not food safety. Date every package. The National Center for Home Food Preservation specifically recommends labeling frozen packages with the food and packaging date.
Frequently Asked questions
1. Can I water seal raw meat in a Ziploc bag?
Yes. Use a clean, freezer-grade bag, prevent water from entering, refrigerate or freeze promptly, and sanitize surfaces that contacted raw meat.
2. Is water displacement the same as vacuum sealing?
No. It removes much of the surrounding air but generally does not create the strong vacuum produced by a dedicated vacuum-sealing machine.
3. Can I water seal soup in a Ziploc bag?
Yes, but leave enough empty space to keep liquid away from the zipper. If freezing it, also allow room for expansion.
4. Does water sealing make food shelf-stable?
No. Perishable food still requires refrigeration or freezing. Removing oxygen is not a substitute for canning, heat processing, or other validated preservation methods.
Simple Kitchen Trick That Works With Good Food-Safety Habits
The clever part of this technique is not really the bag; it is the pressure surrounding it. Water presses against areas your fingers cannot easily reach, pushing excess air upward and creating a tighter package without specialized equipment.
I find it most useful for freezer portions, meal prep, marinades, and appropriate sous vide preparations. But I would never treat a tight-looking package as proof that food is preserved indefinitely. Use freezer-grade bags, keep the opening dry, remove as much air as practical, label the package, and maintain safe temperatures. That combination makes this simple trick genuinely useful rather than merely clever.