If you’ve ever thought about transforming your backyard into a more organized, functional space, building a DIY garden shed might be the perfect solution. I had that very idea last summer when my garage was overflowing with tools, gardening supplies, and random storage items. It wasn’t until I decided to take the plunge and build my own shed that everything finally had a place. Trust me, it’s easier than you think, and the satisfaction of seeing your work come to life is worth it.
Building a DIY garden shed can save you a significant amount of money on labor costs, typically ranging from $17 to $40 per square foot for a 12×12 build. While a basic 7×8 custom build might cost around $700–$1,000, professional custom builds for the same size can reach $4,000–$6,000 or more. If you’re ready to get started, here’s a detailed guide on how you can build a garden shed yourself.
Why Build a DIY Garden Shed?
A DIY garden shed is more than just a place to store tools. It can be a custom, practical space that adds both functionality and value to your property. Plus, it allows you to personalize the design and ensure that the shed meets your exact needs.
Whether you want a simple storage shed for your lawn equipment or a more elaborate workspace for hobbies, building your own shed gives you complete control over the process.
How to Build Your DIY Garden Shed
Building your own DIY garden shed can be a rewarding project. Here’s a step-by-step guide to help you get started.
1. Choose the Right Location
The first step in building a DIY garden shed is selecting the perfect location in your yard. Ideally, choose a flat, well-drained area where water won’t pool. Avoid low spots and areas that are too close to trees, as roots can interfere with the foundation. Consider the amount of sunlight the location gets, as this will affect the shed’s interior temperature if you plan to store plants or gardening supplies.
2. Prepare the Foundation
The foundation is one of the most critical parts of building a shed. There are several options for creating a solid foundation, depending on your preferences and budget:
- Gravel Pad: Simple and affordable, perfect for smaller sheds.
- Concrete Slab: The most durable and weather-resistant choice, ideal for larger, more permanent structures.
- Wood Skids: Pressure-treated 4×4 or 4×6 timbers laid on gravel, offering a more portable option.
After preparing your foundation, build a floor frame using pressure-treated 2×6 lumber. Make sure the frame is level and square before moving on.
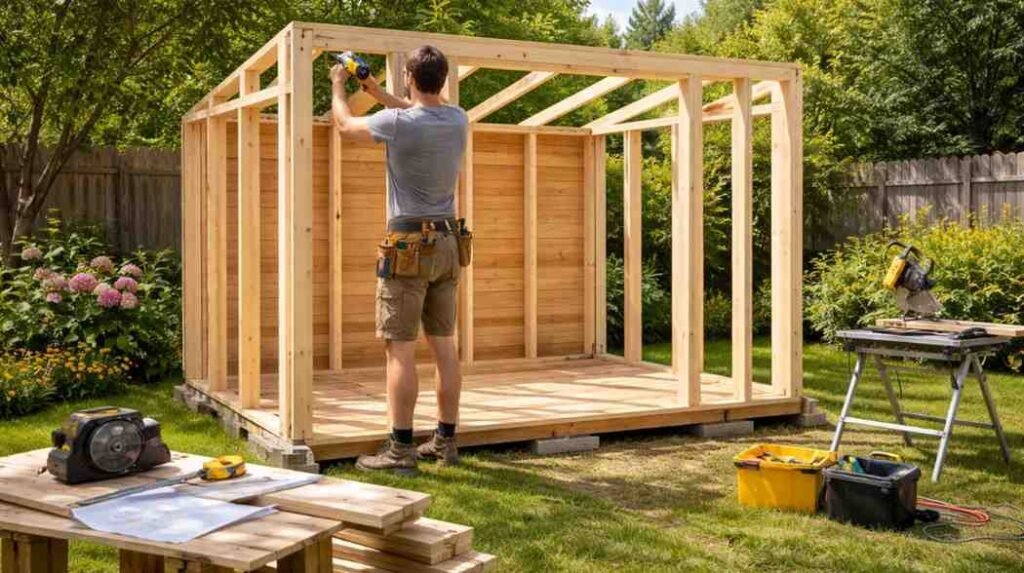
3. Build the Shed Frame
Start assembling the walls of your shed.
Build the Shed Walls
Start by constructing the wall sections on the ground using 2×4 studs spaced 16 inches apart. Make sure the top and bottom plates are securely fastened, and use a level to check the alignment.
Stand Up the Walls
Once all four walls are built, carefully lift them into place and secure them to the foundation.
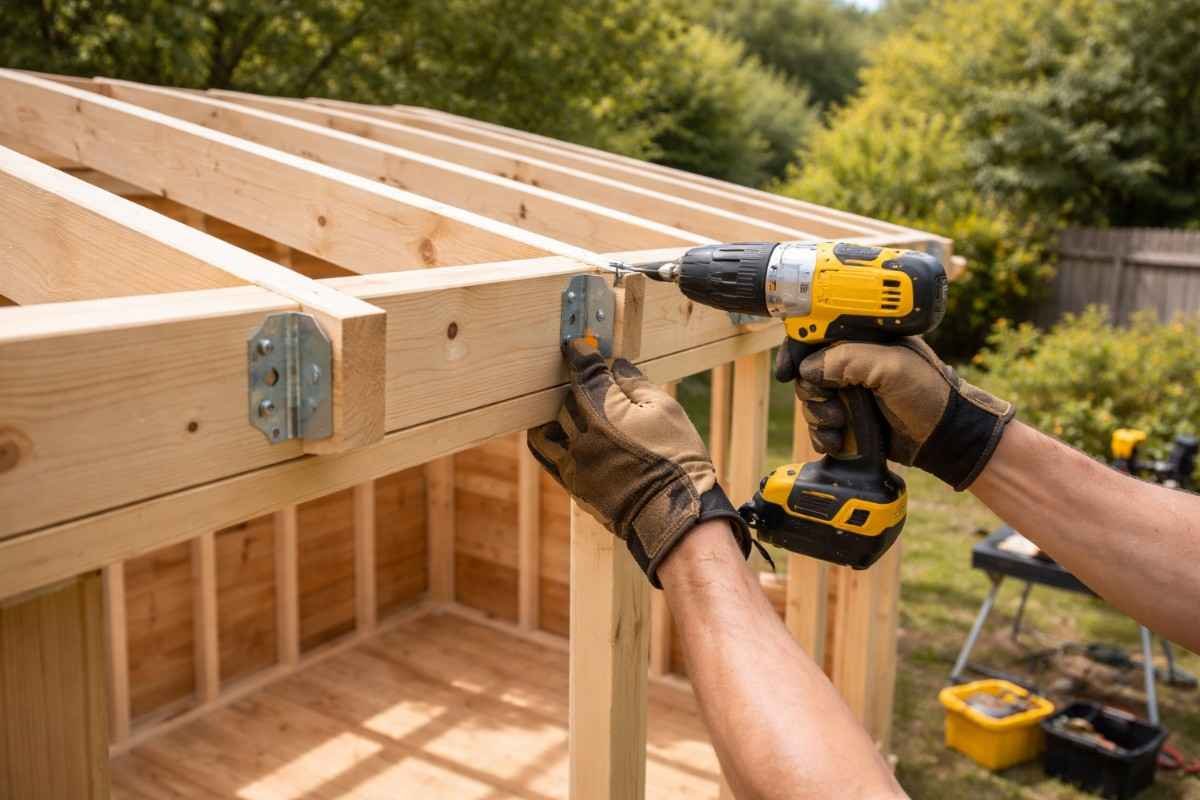
Install the Roof Rafters
For the roof, install 2×4 rafters at a slope to ensure proper drainage. Secure the rafters with hurricane ties for extra stability.
4. Add Sheathing and Siding
Now it’s time to add sheathing to your shed. Use 1/2-inch plywood for both the walls and the roof. This will give the shed structure and support. For the exterior, popular siding choices include LP Smart Siding or T111 panels, both of which are durable and weather-resistant.
When applying the siding, make sure the panels are aligned properly, and use nails or screws to secure them in place.
5. Install the Roof and Finishing Touches
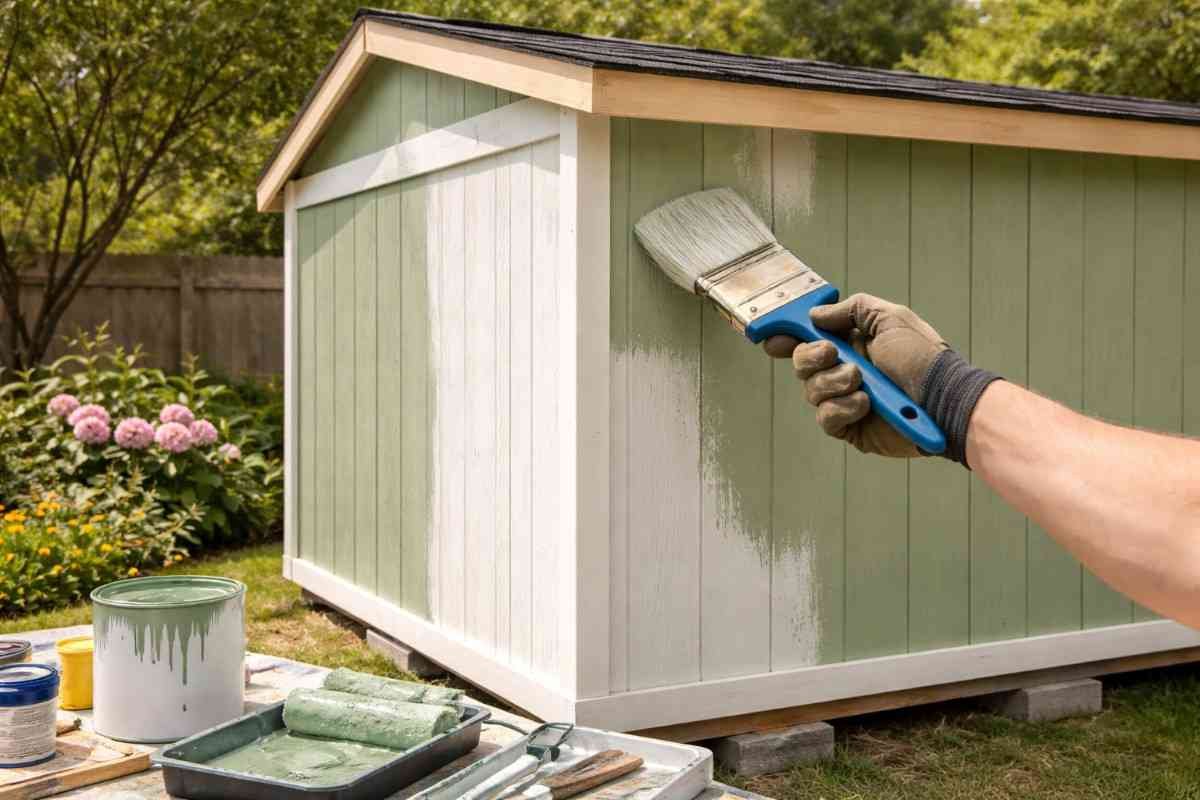
To finish your shed, apply roofing materials such as asphalt shingles or metal panels, depending on your preference. The roof should be installed with a slight slope to ensure proper water runoff. After the roof is in place, install the door, windows, and trim. If you’re adding windows, consider placing them strategically to allow for ventilation.
Essential Tools and Materials
Before starting your DIY garden shed, make sure you have the right tools and materials. Here’s a list of what you’ll need:

Key Tools:
- Circular saw
- Power drill/impact driver
- Hammer
- Level
- Tape measure
- Step ladder
Materials:
- Pressure-treated lumber for the frame and floor
- 1/2-inch plywood for sheathing
- Siding materials (LP Smart Siding or T111 panels)
- Roofing materials (asphalt shingles or metal panels)
- Nails or screws
If you want to simplify the framing process, you can also use a framing kit, like the EZ Shed Framing Kit, which costs around $50–$55 and eliminates the need for complex angle cuts.
Frequently Asked Questions
1. How much does it cost to build a DIY garden shed?
The cost to build a DIY garden shed varies depending on the size, materials, and complexity. For a small to medium shed, expect to spend between $700–$2,500. This includes lumber, roofing materials, siding, and any necessary tools.
2. What’s the best material for the shed roof?
For a DIY garden shed, metal roofing is an excellent choice due to its durability, longevity, and resistance to harsh weather conditions. However, asphalt shingles are also a popular, affordable option that works well for most sheds and offers good protection.
3. Can I build a garden shed without a permit?
In many locations, small garden sheds do not require a permit, but it’s essential to check with your local zoning office before beginning construction. Some areas have size restrictions or require specific permits depending on the type of shed you’re building.
Be Your Own Handyman!
Building your own DIY garden shed is not only a practical solution for outdoor storage, but it’s also a rewarding project that allows you to personalize your space. By following these steps, you can create a functional shed that meets your needs without the high cost of hiring professionals. Start planning today, and before you know it, you’ll have the perfect garden shed in your backyard!


