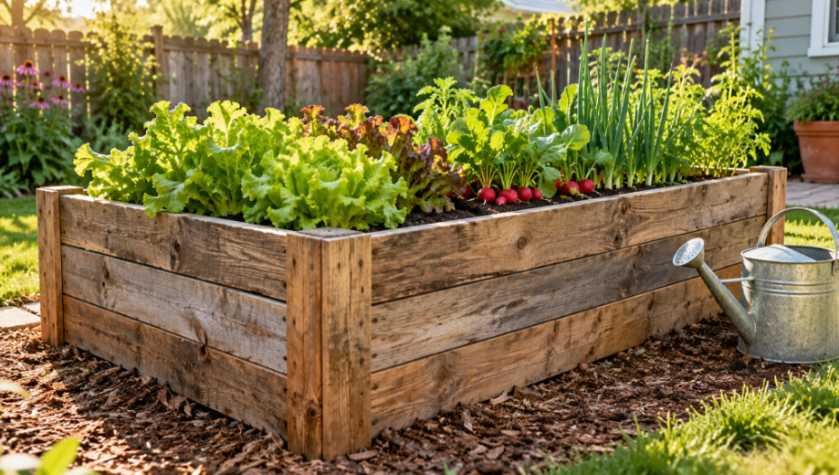
I built my first diy pallet wood raised garden bed for cheap after pricing cedar boards at my local lumberyard and discovering that four basic 2×6 planks would run me nearly ninety dollars. That price tag felt absurd for a simple backyard vegetable patch. I turned to discarded shipping pallets stacked behind a local plumbing supply warehouse, loaded two into my truck bed for zero dollars, and built a rugged, productive 2×4-foot planter in under an hour.
The entire build cost me exactly $13.50 for exterior-grade screws and scrap landscape fabric. If you want fresh salad greens without draining your wallet, this fast-build method bypasses the miserable chore of completely disassembling stubborn pallet boards while guaranteeing chemical-free soil.
Sourcing Safe Pallets Without Poisoning Your Vegetables
Before cutting a single board, you must verify how the mill treated the timber. Food crops absorb volatile compounds directly from contaminated planting environments, making lumber provenance non-negotiable.
Decoding the IPPC Stamp
Look for the official wheat-symbol brand issued under standards established by the International Plant Protection Convention (IPPC). This mark is branded directly into the wood stringers:
- HT (Heat Treated): The wood was heated to a minimum core temperature of 56°C for at least 30 minutes. This process neutralizes pests without synthetic chemicals, making it completely food-safe.
- KD (Kiln Dried): Lumber heated in commercial kilns to bring moisture content down. It contains zero toxic additives.
- MB (Methyl Bromide): Fumigated with a dangerous neurotoxic pesticide. Walk away immediately.
Research published by the USDA Forest Products Laboratory highlights that industrial wood packaging marked HT represents clean, untreated softwoods or mixed hardwoods suitable for residential repurposing.
+———————————————+
| [IPPC LOGO] US – 11094 |
| HT |
+———————————————+
^ Look for the “HT” code
Visual Red Flags to Avoid
Never trust an unmarked pallet, regardless of how clean the grain looks. Skip pallets painted bright solid blue, orange, or red. These indicate proprietary corporate pools (such as CHEP or PECO) treated with industrial flame retardants or durable surface sealers.
Pass on wood with dark oily stains, chemical aromas, or signs of transport spills. Clean, weathered gray or honey-toned pallets stamped with HT are your target.
The Half-Cut Method: How I Built Mine in Under 45 Minutes
Standard woodworking tutorials suggest pulling every pallet slat off with a crowbar. That approach splits brittle pine boards, bends nails, and consumes hours of brute physical labor. The half-cut method preserves the structural framework already built into the pallet.
CUT ALONG CENTER LINE
|
v
+————-+————-+
| [ ] [ ] [ ] | [ ] [ ] [ ] | <- Pallet Half A (Long Wall)
+————-+————-+
| [ ] [ ] [ ] | [ ] [ ] [ ] | <- Pallet Half B (Long Wall)
+————-+————-+
Essential Tools and Hardware
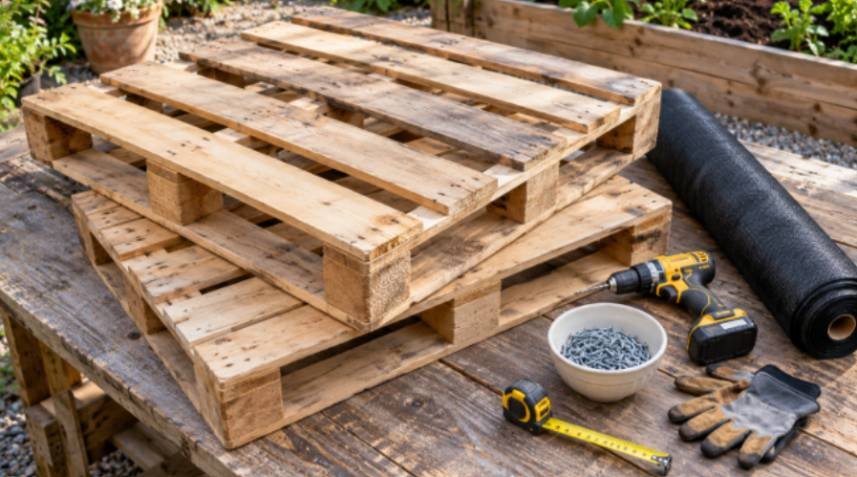
You do not need an extensive workshop to assemble this frame:
- Two Heat-Treated Pallets: One yields both long side walls; the second provides the two end caps and corner support posts.
- 2.5-Inch Exterior Coated Deck Screws: Avoid interior drywall screws; they snap under the sheer weight of damp soil.
- Handheld Circular Saw or Hand Saw: A basic hand saw works fine through standard 1/2-inch pallet slats.
- Drill with Driver Bit and 1/8-Inch Pilot Bit: Vital for preventing cracked lumber.
- Heavy-Duty Staple Gun: Loaded with 3/8-inch galvanized staples.
- Porous Landscape Fabric: Enough to line the interior wooden walls.
Step-by-Step Framing and Assembly
Lay your first pallet flat on a level driveway or lawn. Measure across the outer deck boards, mark the exact center, and draw a straight line straight down the middle of the central stringer.
Run your saw down that pencil line. Be mindful to avoid hidden cross-nails embedded in the wood. You now possess two rigid, matching panel sections that measure roughly four feet long and twenty inches high.
Next, take your second pallet and pull off four structural 2×4 runner blocks using a pry bar. Cut these down to twenty inches to serve as vertical corner anchor posts. Cut the remaining deck boards down to two feet in length to serve as your narrow end walls.
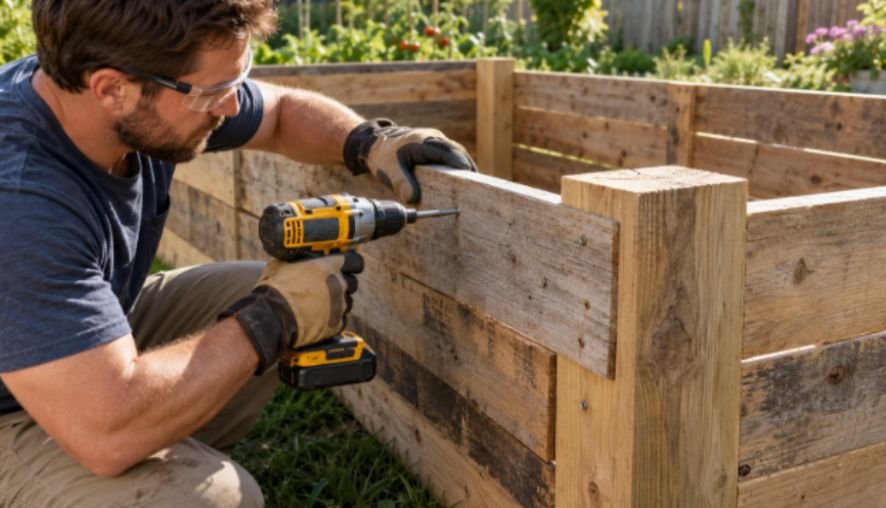
Stand one four-foot side section and one two-foot end section together on edge at a strict ninety-degree angle. Slip an anchor block into the inner corner seam.
Drill two pilot holes through the exterior slat into the thick post, then sink your 2.5-inch exterior deck screws flush. Repeat this process at all four corners until you have a freestanding, rigid rectangle.
Soil Pressure and Center Bracing
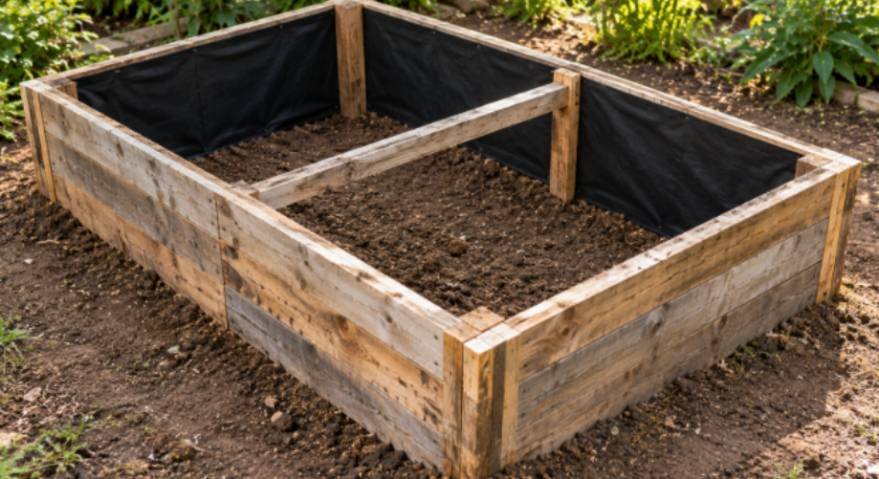
A raised bed holding damp topsoil endures immense lateral pressure. Without reinforcement, pallet side walls bow outward within forty-eight hours of your first heavy rain.
To eliminate wall failure, cut a scrap pallet board to fit directly across the middle of your bed frame. Fasten this cross-brace horizontally across the center stringers, pulling the opposite long walls tightly together. This single board locks the geometry in place and prevents outward warping.
Line only the vertical interior walls with breathable landscape fabric, fastening it every four inches with heavy-duty staples. Leave the bottom completely open to the native ground below. This allows earthworms to migrate into the bed while giving deep-rooting vegetable systems unhindered access to subsoil moisture.
The Zero-Dollar Fill: Hugelkultur Layering Mechanics
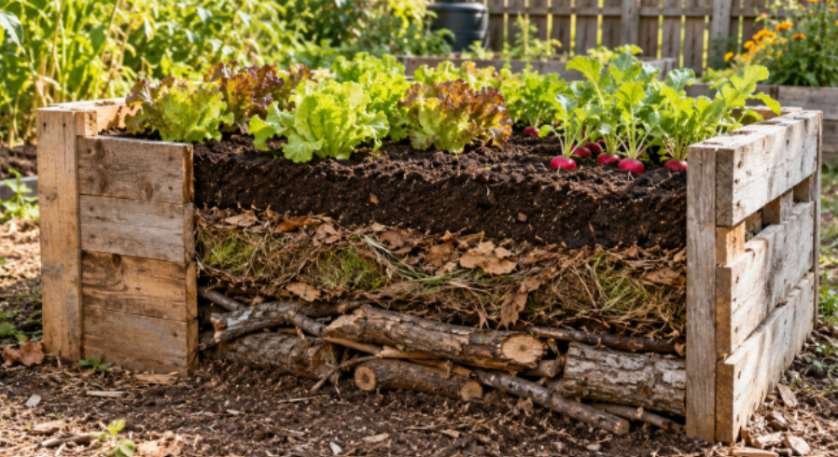
Filling an eighty-gallon raised box entirely with bagged retail potting mix can cost between sixty and one hundred dollars. That expense defeats the purpose of an economical garden build.
Repurposing materials is another way to keep garden projects affordable while reducing household waste. For more budget-friendly ideas, explore these DIY projects with plastic bottles and discover creative ways to reuse everyday items.
Instead, fill the bottom two-thirds of the structure using hugelkultur principles documented by Oregon State University Extension Service. This traditional German horticulture method relies on decomposing organic forest debris to generate natural fertility and retain moisture.
+——————————————————-+
| TOP 30%: Topsoil + Mature Compost (Active Root Zone) |
+——————————————————-+
| MIDDLE 30%: Grass Clippings, Kitchen Scraps, Leaves |
+——————————————————-+
| BOTTOM 40%: Rotted Logs, Thick Tree Limbs, Branches |
+——————————————————-+
///////////////// Native Garden Earth ///////////////////
The Woody Base Foundation
Fill the lower 40% of the wooden frame with dense, carbon-rich material. Fallen hardwood limbs, weathered logs, split cordwood, and thick tree pruning scraps belong here.
Pack this woody mass tightly against the native earth. As these logs break down over successive seasons, they act like internal sponges, absorbing surplus spring rains and feeding moisture back up to your crops during summer heat waves.
The Nitrogen Transition Layer
Over the foundational logs, pack in a four-inch transition blanket of rich nitrogenous material:
- Green grass clippings free from herbicide applications
- Shredded fall leaves and garden trimmings
- Untreated kitchen vegetable scraps
- Well-aged straw bedding
Soak this transition layer thoroughly with a garden hose. This kickstarts active microbial decomposition, warming the bed from below and accelerating the breakdown of the larger logs beneath it.
The Active Rooting Zone
Finish the top six to eight inches with your actual growing medium. Mix equal parts sifted native topsoil, finished home compost, and coarse builder’s sand or perlite to maintain rapid drainage.
When planning the area around your raised bed, choosing suitable ground materials can also improve the look and function of your garden space. Learn where chat gravel works best to explore potential uses for gravel in outdoor landscaping.
Shallow-root varieties like butterhead lettuce, spinach, radishes, and scallions thrive immediately in this top tier. By the time larger crops push taproots deeper during mid-season, the lower hugelkultur materials will have softened into friable, biologically active humus.
Frequently Asked Questions
1. How long does an untreated pallet garden bed typically last?
A pine pallet bed lasts three to four seasons before decomposing, while oak or locust pallets survive up to six years.
2. Do I need to paint or seal pallet wood before adding soil?
No, commercial chemical sealers risk leaching compounds into your food, while raw wood weathers naturally and safely on its own.
3. Can I place my pallet raised bed directly on a concrete patio?
Yes, but you must attach a secure, fabric-lined slatted base to elevate the lumber slightly and allow irrigation runoff.
4. How many vegetables can I harvest from a single pallet bed?
A standard 2×4-foot pallet bed comfortably yields over thirty pounds of fresh leafy greens, herbs, and root crops per season.
Ditch the Lumber Yard and Dig In
Growing clean, nutrient-dense vegetables does not require pristine cedar boards or specialized construction skills. By harvesting safe, heat-treated wooden pallets and stacking local organic debris inside, you get an ultra-durable raised bed that outproduces standard tilled garden plots while keeping your total spending under fifteen dollars.
If you’re expanding your backyard gardening setup, adding a dedicated space to store tools, pots, and other supplies can help keep everything organized. Explore these DIY garden shed ideas for practical garden storage inspiration.
Grab a battery-powered drill, hunt down two clean HT pallets behind your local feed store or construction supplier, and assemble your frame this weekend before planting season slips away.